How to Create a Scenario in InfoSWMM and InfoSWMM SA
When you define a scenario, you pick the facility, data, and option sets that comprise that scenario. When picking data sets for inclusion in a scenario, you may either specify that a data set associated with a given scenario is used independent of other scenarios, or alternatively may specify that the given data set inherits its contents – properties – from a “parent” scenario. Once you have configured and created a scenario, you can activate that scenario either by selecting the ![]() button from the Scenario Explorer tools or by using the Active Scenario Combo Box (
button from the Scenario Explorer tools or by using the Active Scenario Combo Box (![]() ) from theInfoSWMM H2OMap SWMM InfoSWMM SA Control Center Toolbar Standard Toolbar at any time. Once a scenario is activated, any modifications made to any of the databases related to InfoSWMM H2OMap SWMM InfoSWMM SA facilities will be changed, but only for the data sets that are related to, and dependent upon, the active scenario.
) from theInfoSWMM H2OMap SWMM InfoSWMM SA Control Center Toolbar Standard Toolbar at any time. Once a scenario is activated, any modifications made to any of the databases related to InfoSWMM H2OMap SWMM InfoSWMM SA facilities will be changed, but only for the data sets that are related to, and dependent upon, the active scenario.
Do the following to Create a Scenario:
- Launch Scenario Explorer by selecting Scenario Explorer from the InfoSWMM H2OMap SWMM InfoSWMM SA Scenario Menu or by clicking the Scenario Explorer button (
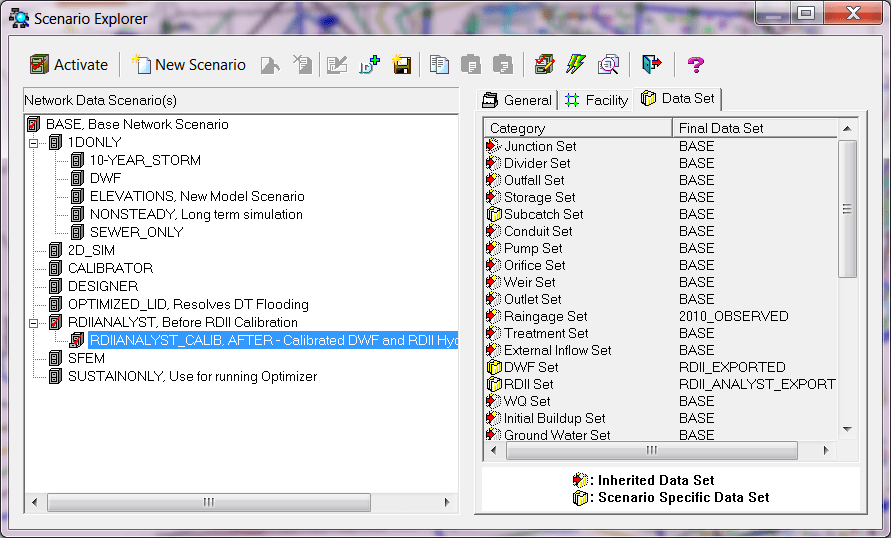
 ) on the InfoSWMM H2OMap SWMM InfoSWMM SA Control Center Toolbar Standard Toolbar . You will see the following dialog box
.

- Choose the Scenario from which you wish to create "Child" by clicking on that Scenario in the Scenario Display section of the Scenario Explorer. Click here for more information on the Parent-Child inheritance mechanism inInfoSWMM H2OMap SWMM InfoSWMM SA .
- Click on the New Scenario button
 to create a new child scenario under the currently selected/highlighted scenario.
 - Specify an ID and a Description for the Scenario (up to 32 characters, no spaces, no funny characters for the ID and 60 characters for the description) and click on OK.
- The New Scenario just created will contain the same Data sets as its parent. On the right window of the Scenario Explorer, click on the Data Set tab. Click on any Data Set that you want to customize.
- This will launch an editor for that specific data set. Choose the Data Set you want to clone and click on the Clone button
 . You could also use the New button (
 ). For the difference between cloning a data set and creating a new data set refer to the Data Set tab of the Scenario Explorer. Specify an ID and Description for the new dataset and create the new dataset.
 - Choose the Newly Created dataset and click on the
 button to associate it with the Scenario. For more information on the InfoSWMM H2OMap SWMM InfoSWMM SAdatasets, refer to the data set page of the Scenario Explorer.
 - Now click on the Scenario Explorer - Facility tab to choose your Facility Set. Choose from among the different options available to define your Network Facilities.
- Once you have chosen your Data Sets and your Facility Sets, customize your Modeling Options by clicking on the Scenario Explorer - General tab.
- Once the Scenario customization and creation process is completed, click on the
 button at the top of your Scenario Explorer dialog box to save and exit.
 - Activate your New Scenario either by selecting the
 button from the Scenario Manger or by selecting the new scenario using the Active Scenario Combo Box (
 ) from the InfoSWMM H2OMap SWMM InfoSWMM SA Control Center Toolbar Standard Toolbar . Choose OK on the confirmation box to activate your new scenario.
Note:
- Active Scenarios or their Parents cannot be customized. To customize the Facility sets, General Modeling Options and the Data Sets for active scenarios you would first need to de-activate the scenario i.e., have another Scenario active.
- The Base Scenario's options cannot be customized.