Export Manager Tools for InfoSWMM and InfoSWMM SA
The Export Manager enables the modeler to export InfoSWMM H2OMap SWMM 's element data (both graphical details and attribute data).
Click on the following links for more information:
To Launch InfoSWMM H2OMap SWMM Export Manager, do the following:
- Fromthe InfoSWMM H2OMap SWMM Exchange menu select Export Manager. This will initiate the dialog box indicated below.

Contents of the Export Manager dialog editor is described below.
| Name | Description |
| Export Element Type | Select the type of element for which an export file is to be created Conveyance Node (i.e. junction, outfall, divider, or storage unit) Conveyance Link (i.e. conduit, pumps, weir, orifice, or outlet). |
| Element Scope | The element scope is used to create the elements made available for an export. The 3 element scope options are:
·
|
| Export Options | Refer to the Export Options section |
| Target File | Refer to the Export Options section |
| Next | This button will initiate the Export Manager Field Mapping dialog editor that will enable you to mapInfoSWMM H2OMap SWMMInfoSWMM SA data fields to the corresponding field on the exported file. |
Export Options
The options allow the user to specify the type of export file to be created and its destination.
- Format - Choose from Delimited Text (comma, tab, etc.), ESRI Shapefile or MapInfo MIF/MID formats.

- Delimiter - With the delimited text option, the type of delimiter to use in the export file (tab, comma, etc.) This option is only available when exporting to a Delimited text file. A delimiter can be defined as a data separator. For instance if comma is chosen as the delimiter, commas will be used to separate the different data chosen for export. You may choose the delimiter from among the options below:
- Create Field Title (First) Row - Create a field title. This choice is available only with the Delimited Text option. The title or the column header will appear in the first row of the export file.
- Prefix ID - Only applies to the delimited text option. All elements exported will have the Prefix ID inserted before their unique identification. If this box is not checked, no prefix will be inserted.
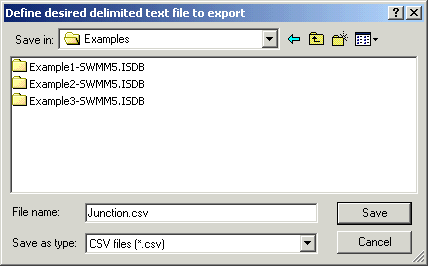
- Destination File - Choose the location on your network or your hard drive to save the exported file. Click on the More icon
 to bring up the navigation dialog box. Click on Save to return to the InfoSWMM H2OMap SWMM InfoSWMM SA Export Manager.
Export Manager Field Mapping
Use this to select the export data fields from among the available ones to export. The available InfoSWMM H2OMap SWMM InfoSWMM SA fields are listed under the Available Data fields section of the dialog box. Click on any of the fields that you want to export and click on the Add button. Choose Add All to export all the fields.

Contents of this dialog editor are:
| Name | Description |
| Available Data fields | Lists all available fields that have not yet been chosen for inclusion in the export file. If a field has already been selected, it will appear in the Display Fields list to the right of the Available Fields list. Only those fields associated with the selected data categories in step 1 will be available for selection. |
| Export Data Fields | Lists all fields selected for inclusion in the export file. The fields will be displayed in the order that they appear in the Display Fields list. The field listed at the top is displayed first in the export data file while the field listed at the bottom of the Display Fields list is displayed at the end of the export data file. Use the Move Up or Move Down buttons to set the field display order. It is normally a good practice to include the ID field for all InfoSWMM Exports since the ID field is the primary key and all other fields relate to the element with the specified ID. |
| Add | To use this icon, select one record from the available fields box, click the Add Single Field icon and the field is now added to the export file. |
| Add All >> | When this icon is used, all fields from the available fields box will be moved to the display fields box. |
| < Remove | To use this icon, select one record from the display fields box, click the Remove Single Field icon and the field is now removed from the export file. |
| << Clear All | When this icon is used, all fields from the display fields box will be removed from inclusion in the export file. |
| Save... | By using the save feature, the user can store an export template to a field collection folder. With a saved folder, an export file can be recalled during any export procedure. |
| Load... | This icon will open a previously saved field collection table. This is a time saving feature that allows the user to create an export template to be later recalled by the open feature. |
| Move Up | Using the move up and move down icons, the user can order the fields for export. |
| Move Down | Using the move up and move down icons, the user can order the fields for export. |
| Back | Use this to return to the previous Dialog box. |
| Finish | Choose this to conclude the Export process. The export file has now been saved as per your choice and contains all the selected data fields |
| Close | Close the dialog editor. |